Ultimate Spring Cleaning Guide: Natural Hacks and Smart Organizing Tips for a Fresh Home
Posted by G. Nicholas on
Introduction:
Spring isn't just a time for flowers to bloom and birds to sing; it's the perfect season to rejuvenate your home from the inside out. Traditionally, spring cleaning is a time to clear out the cobwebs of winter, declutter, and start afresh with a clean, organized space. But why settle for the ordinary when you can transform your home cleaning into a revitalizing ritual that enhances your living space and your life?
Imagine transforming your home from cluttered to curated with just a few simple steps! This guide isn't just about dusting off shelves and sorting through closets—it's about creating a space that renews your energy and brings joy every time you walk through the door. From natural cleaning hacks that keep your home and the planet healthy to smart organizing techniques that make every inch of your space work for you, get ready to discover the art of spring cleaning. Unleash the power of a clean home to refresh your mindset and restore peace and productivity to your daily life.
Stay tuned as we dive deep into practical, easy-to-implement strategies that will not only streamline your cleaning routine but also introduce you to innovative ways to maintain a vibrant home environment all year round.
Decluttering Strategies
Subheading: "Start Fresh: Decluttering Your Space Efficiently"
Decluttering isn't just about creating space—it's about setting the stage for a cleaner and more enjoyable living environment. Here's how you can tackle the clutter efficiently, ensuring that your home feels as refreshing as the spring breeze.
1. Set Clear Goals
Before you dive into sorting and tossing, set clear, achievable goals. Are you looking to declutter a specific room, or are you aiming to minimize your possessions across the board? Establish what success looks like for you, whether it’s being able to easily find everything you need or transforming a room into a more functional space.
2. The Four-Box Method
Simplify the decision-making process with the four-box method: keep, donate, throw away, or store. As you review items, ask yourself if they’ve been used in the last year, if they bring you joy, and if they will be useful in your current life phase. This method forces immediate decisions, making the process faster and more decisive.
3. One Room at a Time
Focus on one room at a time to prevent feeling overwhelmed. Start with high-traffic areas like the living room or kitchen, which often see the most clutter. By clearing these areas first, you'll quickly notice improvements in your living space, providing motivation to continue.
4. Digital Declutter
Don’t forget about digital clutter. Organize and delete old files on your computer and phone. Unsubscribe from unwanted email lists and organize your digital photos. This not only frees up storage space but also reduces mental clutter.
5. Implement Smart Storage Solutions
After decluttering, look at how you’re storing what’s left. Use drawer dividers, clear storage containers, and labels. This not only helps keep items organized but also makes it easier to find what you need and maintain order over time.
6. Make It a Habit
Finally, schedule regular mini-declutter sessions. Spending just 10-15 minutes a day or setting aside time weekly to go through mail, paperwork, or any small area that tends to collect clutter can keep your space neat and manageable.
Natural Cleaning Solutions
Subheading: "Eco-Friendly Cleaning Hacks for Every Corner"
Embrace the power of nature this spring with eco-friendly cleaning hacks that are simple, safe, and effective. These DIY solutions not only reduce your chemical footprint but also keep your home sparkling clean. Here’s how to whip up your own natural cleaners that work wonders on every corner of your house.
1. All-Purpose Lemon Vinegar Cleaner
Combine the natural disinfectant properties of vinegar with the refreshing scent of lemon for a powerful all-purpose cleaner. Simply fill a jar with lemon peels, pour undiluted white vinegar over them, and let the mixture sit for a week before straining it into a spray bottle. Use it to wipe down countertops, clean windows, and make mirrors sparkle.
2. Baking Soda Oven Cleaner
Forget about harsh chemicals and make your oven shine with a simple paste made from baking soda and water. Spread the mixture throughout the oven, let it sit overnight, and then scrub and wipe clean. The abrasive action of baking soda removes built-up grime effortlessly without scratching surfaces.
3. Essential Oil Disinfectant Spray
Create a natural disinfectant spray that's perfect for bathrooms and kitchen surfaces. Mix 1 cup of water, 1 cup of white vinegar, and 20 drops of your favorite essential oil (like tea tree or eucalyptus) in a spray bottle. Shake well and spray on surfaces before wiping down to disinfect and deodorize.
4. Cornstarch Window Cleaner
Achieve streak-free windows with a simple solution of cornstarch, white vinegar, and water. Combine 2 tablespoons of cornstarch with ½ cup of white vinegar and ½ cup of warm water. Mix well, apply to windows with a clean cloth, and polish with a dry cloth for sparkling results.
5. Natural Carpet Freshener
Freshen up your carpets with a homemade deodorizer. Mix 2 cups of baking soda with 10-15 drops of essential oil (like lavender or peppermint). Sprinkle the mixture on your carpets, let it sit for 15-20 minutes, then vacuum as usual for a fresh and clean scent.
6. Grapefruit Salt Scrub for Tubs
Cut a grapefruit in half, sprinkle it with salt, and use it as a scrub for your bathtub and sink. The citric acid helps break down dirt and grime, while the salt acts as a gentle abrasive. Plus, the fresh scent leaves your bathroom smelling clean.
Cleaning High-Impact Areas
Subheading: "Deep Clean Essentials: Focus on High-Impact Areas"
When it comes to spring cleaning, certain areas of your home deserve extra attention due to their frequent use and susceptibility to grime and germs. Here's how to tackle the kitchen, bathroom, and living areas with effective deep cleaning tips that will leave your home feeling truly refreshed.
1. Kitchen Cleaning Conqueror
The kitchen is the heart of the home but also a hotspot for bacteria and buildup. Start by degreasing cabinet doors and backsplashes with a solution of warm water and dish soap or your DIY lemon vinegar cleaner. Clean the inside of your appliances, including the oven, microwave, and refrigerator, using natural solutions like baking soda for scrubbing and a mix of vinegar and water for surface cleaning. Don’t forget to pull out appliances and sweep behind them.
2. Bathroom Brilliance
Bathrooms can be challenging due to moisture and constant use. Begin with shower walls and doors, using the grapefruit salt scrub or baking soda paste to remove soap scum and water stains. For toilets, sprinkle baking soda inside the bowl, pour in vinegar, let it fizz, then scrub. Wash any shower curtains and liners, and replace if necessary. Finally, clear out any expired products from your medicine cabinet and restock with essentials.
3. Living Area Refresh
Living rooms require special attention to fabrics and surfaces. Vacuum sofas and chairs, using attachments to get into the crevices. Consider shampooing or steam cleaning upholstered furniture if it’s been a while. Wipe down all surfaces, including coffee tables and entertainment centers, with your all-purpose cleaner. Don’t overlook light fixtures and ceiling fans, which can accumulate a surprising amount of dust.
4. Floor Focus
Across all these areas, floors should be the final step. Sweep or vacuum thoroughly before mopping or shampooing carpets. In the kitchen and bathroom, use a disinfectant floor cleaner to ensure all germs are eradicated, while a gentle cleaner can maintain the shine on hardwood floors in the living areas without damaging the surface.
5. Ventilation Victory
Lastly, ensure good air quality and prevent mold by checking and cleaning vents and exhaust fans in these high-impact areas. This not only helps in reducing dust but also improves the efficiency of your home's heating and cooling systems.
Organizing Techniques
Subheading: "Organize Like a Pro: Simple Techniques That Work"
After a thorough clean, maintaining that freshness and order is all about smart organizing techniques. Whether you're dealing with a mountain of miscellaneous items or just need a system to keep everything in place, these straightforward strategies will help you organize your home efficiently.
1. Declutter First
Before you start organizing, ensure you’ve decluttered thoroughly as outlined in Section 1. This reduces the amount of items you need to organize and maintain, simplifying the entire process.
2. Utilize Vertical Space
Often underutilized, vertical space can be a game-changer, especially in small homes. Install shelves above doors, use stackable storage bins, and hang organizers on the backs of doors. In closets, consider adjustable shelving to customize storage as your needs change.
3. Label Everything
Avoid the frustration of forgotten items with clear labeling. Use labels on bins, baskets, and shelves to make it easy to find what you need and ensure everything gets put back in its place. For a stylish touch, use a label maker or chalkboard labels.
4. Compartmentalize Drawers
Drawer dividers aren’t just for utensils; they can be used in bedroom and office drawers to separate and organize everything from socks and underwear to pens and notepads. This not only saves time looking for items but also keeps drawers tidy longer.
5. Follow the "One In, One Out" Rule
To keep your home organized and clutter-free, adopt the "one in, one out" rule: for every new item that comes into your home, an old one should leave. This helps maintain the balance of items in your home and prevents clutter from building up again.
6. Make Use of Underutilized Spaces
Look for spaces that are rarely used for storage, such as under beds or on top of cabinets. These areas are perfect for storing out-of-season clothing, extra bedding, or seldom-used gadgets. Use clear storage containers so you can see what's inside without having to pull everything out.
7. Routine Resets
Make it a habit to do a quick reset of your space daily or weekly. This could be as simple as spending 10 minutes each evening tidying up your living room or doing a quick sweep through your kitchen to put things back in their designated spots.
Involving the Family
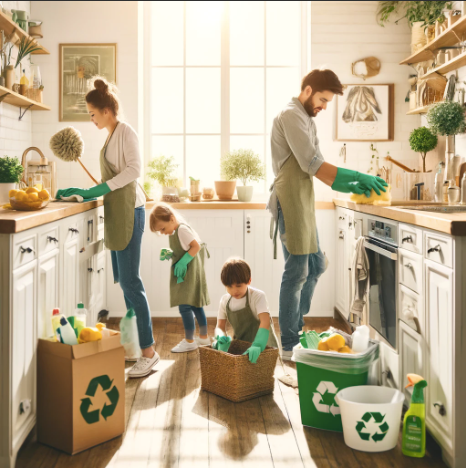
Subheading: "Make It Fun: Involving the Family in Spring Cleaning"
Turning spring cleaning into a family affair not only lightens the workload but also makes it more enjoyable. Here are some creative ways to involve everyone in the household, turning what can be a daunting task into a fun and productive family activity.
1. Assign Age-Appropriate Tasks
Make sure everyone has a role that suits their age and ability. Young children can handle simpler tasks like dusting baseboards or sorting their toys, while older children and teens can take on more complex jobs such as organizing bookshelves or helping to clean out the garage. Giving children specific tasks helps them feel included and important to the family effort.
2. Create a Cleaning Playlist
Everything is more fun with music! Create a family cleaning playlist with everyone’s favorite upbeat songs. This will keep the energy high and make the time pass more quickly. Have a dance-off while dusting or see who can tidy up their area before the song ends!
3. Set Up a Rewards System
Motivate your family with a rewards system. Set goals and when these goals are met, reward the family with a movie night, a special meal, or an outing to a favorite park or other destinations. This not only encourages participation but also gives everyone something to look forward to.
4. Make It a Game
Turn cleaning tasks into games. For example, you could have a race to see who can pick up the most toys in five minutes, or who can match the most socks from the laundry pile. Use timers and keep score to add a competitive element.
5. Celebrate Accomplishments
Take before and after photos of each room to show everyone how much was accomplished. Celebrate these victories to make everyone feel proud of their hard work. This also serves as great motivation for the next cleaning session.
6. Educate While You Clean
Use this opportunity to teach your kids about organization and maintaining a clean environment. Discuss why it’s important to keep certain areas clean and how staying organized can make daily routines easier. This educational aspect can make cleaning feel more meaningful to children.
7. Plan for Regular Mini-Cleanup Sessions
Instead of one long cleaning marathon, break the work into shorter, more frequent sessions that don’t feel as overwhelming. Regular mini-cleanups can be a great way to maintain the cleanliness over time, and it keeps the whole family in a routine.